If this is to be a single light, go to step 4
Such as "SWITCH_GROUP Outside" or "SWITCH_GROUP Living Room"
All lights in the same Switch Group will turn on and off together
- Add the CONFIG_MASTER notecard to this light.
- Add a CONFIG_GROUP group name notecard to this light
Such as "CONFIG_GROUP Path", or "CONFIG_GROUP Pool" - Add the same CONFIG_GROUP notecard to all other lights in this group.
- Now add configuration notecards to the Master Light as needed.
- COLOR
- TYPE
- RADIUS
- SIZE
- SPOT
- GLOW
- FIXTURE_COLOR
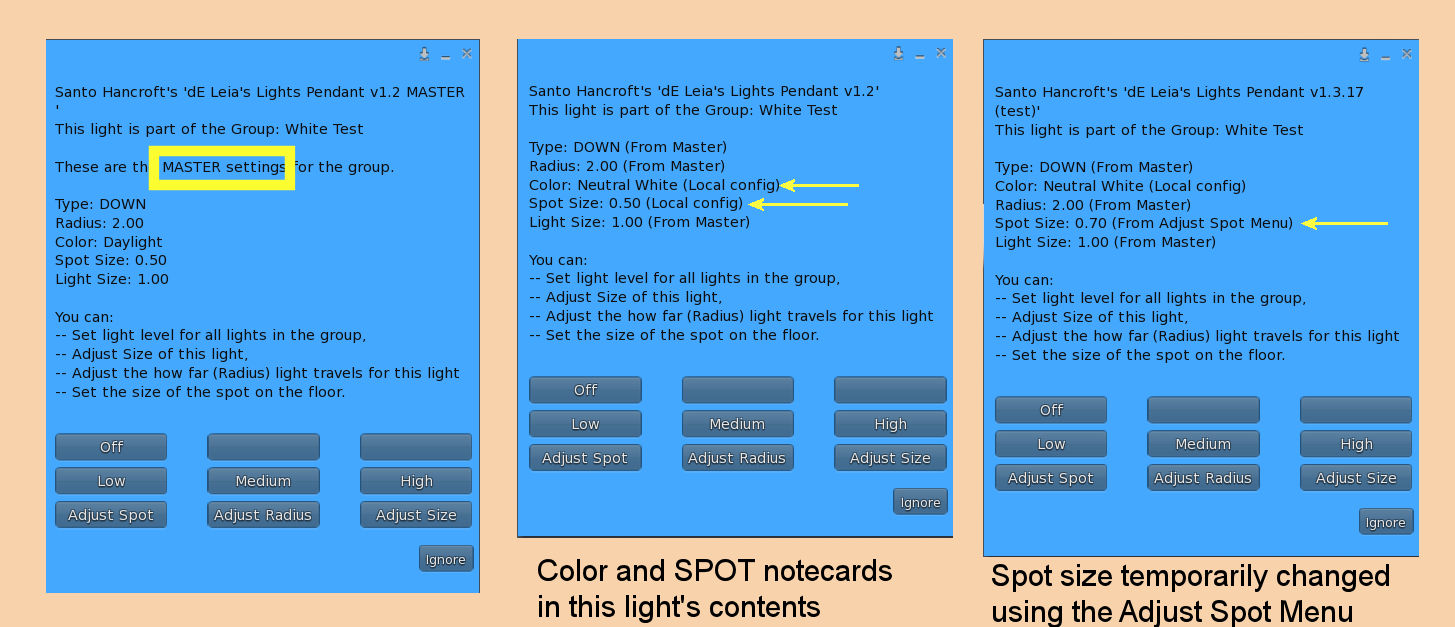
- Changes to these configuration setting in the CONFIG_MASTER light will be sent to each of the other lights.
Note:
If many of your lights are going to have the same configuration, you can use Configuration Groups so you only need to put these notecards in the CONFIG_MASTER light.
But you can over-ride the CONFIG_MASTER configuration values by putting these notecards in individual lights.
- COLOR color
- The color of the light can be
- Daylight - Pure white
- Soft White - Warmer color typically used for homes
- Red
- Green
- Blue
- Yellow
But wait -- you want a different color: You can use the scripting color syntax to define any color of light: < r.r, g.g, b.b >, where the 3 values for intensity of Red, Blue & Green are between zero and one. So the color configuration for a green-blue light would be:
COLOR <0.0, 0.8, 0.90> Here is a useful tool.NOTE: For some custom colors the Dim intensity setting may not look that good.
- RADIUS distance
- This is how far in meters the light will travel (from 0.1 to 20). There is slight fall off in intensity to soften the edges. This setting will also affect the brightness of the light on objects.
for example: RADIUS 4.5 or RADIUS 10
- SIZE scaling_factor
- This is a value greater than 0.1 that controls the size of the light fixture. 1.0 is the default size.
- SWITCH_GROUP name
- Include this notecard in each light in a group that is to be turned on/off at the same time.
- CONFIG_GROUP name
- Include this notecard in each light in a group that is to receive its configuration from the CONFIG_MASTER light.
- CONFIG_MASTER
- If you are using the CONFIG_GROUP notecard, include a CONFIG_MASTER notecard in ONE of the lights. You can then put all of the configuration notecards (for the whole group), in this master light's contents. This master will then send its configuration to all other lights in the configuration group.
- TYPE type
-
This notecard is only used by Pendant or Globe Lights.
- TYPE GP - General Purpose - throws light in all directions
- TYPE GPNC - A General Purpose light but with no light above the light so the ceiling is dark. Like a lamp with a solid shade that only allows light down and to the sides This is most useful to prevent light from penetrating through the ceiling to a second floor.
- TYPE DOWN - Down lights are spot lights that project a circular spot on the floor If you choose this TYPE, you will also need a SPOT notecard. Only the Pendant light supports this Type.
- SPOT Spot angle
- This notecard is only used by Pendant Lights (when configured as "TYPE DOWN"), and Can Lights.
This determines how wide the angle of the spot projection is. But you can think of it as the size of the spot on the floor. It can be between 0.1 and 3.0
- FIXTURE_COLOR color
- The color to be applied to the fixture. If the fixture has a build-in in color or texture, this will modify it.
- White - Reveals the default color of the fixture
- Black
- Silver
- Copper
- Gold
- GLOW d l m h
- The four values after this keyword set the glow for each light level: dim low medium high
The default values are: 0.015 0.023 0.023 0.010
Very low values seem to work best to provide a natural look.
(The CAN light type does not use the Glow attribute)
- INSTANCE some name
- This notecard is only needed if you own more than one building or parcel in a region, AND you will be using Switch or Configuration Groups. The INSTANCE notecard will separate the messaging between lights in these different areas.

Temporary Adjustments
When you touch a light a menu will allow you to select an adjustment menu for Size, Radius, Spot size, and for some lights Glow. These adjustments allow you to quickly experiment and decide what the best notecard values are for these settings. You can then put those values into the notecards.
Any values placed in the notecards of the designated MASTER light are sent to all other lights in the group. But if you want specific lights to have their own settings, just add a notecard for that value to that specific light and it will override the values from the Master Light.

