Kites start as a thin single prim oriented with the Z axis pointed toward the ground, X axis to the right, and Y axis up.
- Rez the Generic Kite object.
It will stay on the ground so you can make all the changes and adjustments. - Add your texture (Prefix the name with "KITE ").
- If you need to change the aspect ratio to match your texture, select Edit Linked to change just the main kite prim. You may need to adjust the position of the tails to align with the main body.
- If you want additional tails or streamers, attach them as child prims. Because the kite will be viewed from some distance away, exact placement is not usually necessary.
- Choose the values for the Configuration Notecards. If you do not own the entire region, be sure to use the PARCEL notecard so the kite stays over your land. (Some land owners do not allow entry of objects from neighboring parcels.)
- Give your new kite a name by changing the NAME notecard. The kite will reset and fly.
Using Your Own Textures
- You will need some image editing software so you can remove any background and have the borders of the image texture transparent.
- Prefix the name of the texture with "KITE ", and copy the texture into the Kite Object's Contents.
- The script will automatically turn all faces of the main prim transparent, and then apply your texture to the front and back.
- Add the texture for the tails to the Contents. Make your texture in a vertical aspect ratio like the ones included in the folder.
The name of the Tail Texture must start with "TAIL "
"TAIL RGB blended".
Making streamers and stabilizers react to the wind.
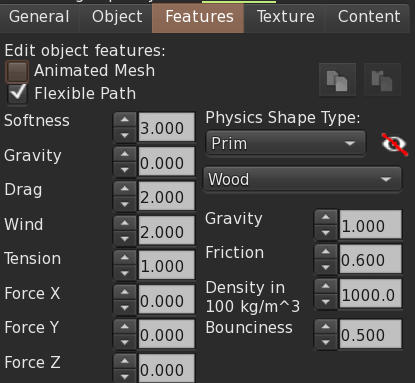
Streamers or tails can be any shape. I've chosen elongated cylinders so the texture appears on all wides.
Configured them for Flexible Path. You can experiment with the settings to get the desired amount of flexibility and responsiveness to the wind.
To add more, just link them to the kit object. Remember to touch the kite prim last when adding child prims.
Multi-prim kites
You can make more complicated kites by linking additional parts as child prims to the main kite object. You will probably want some degree of flexible path configured for them, so they appear loosely connected -- but not as much flexibility as for tails.
Using a mesh object
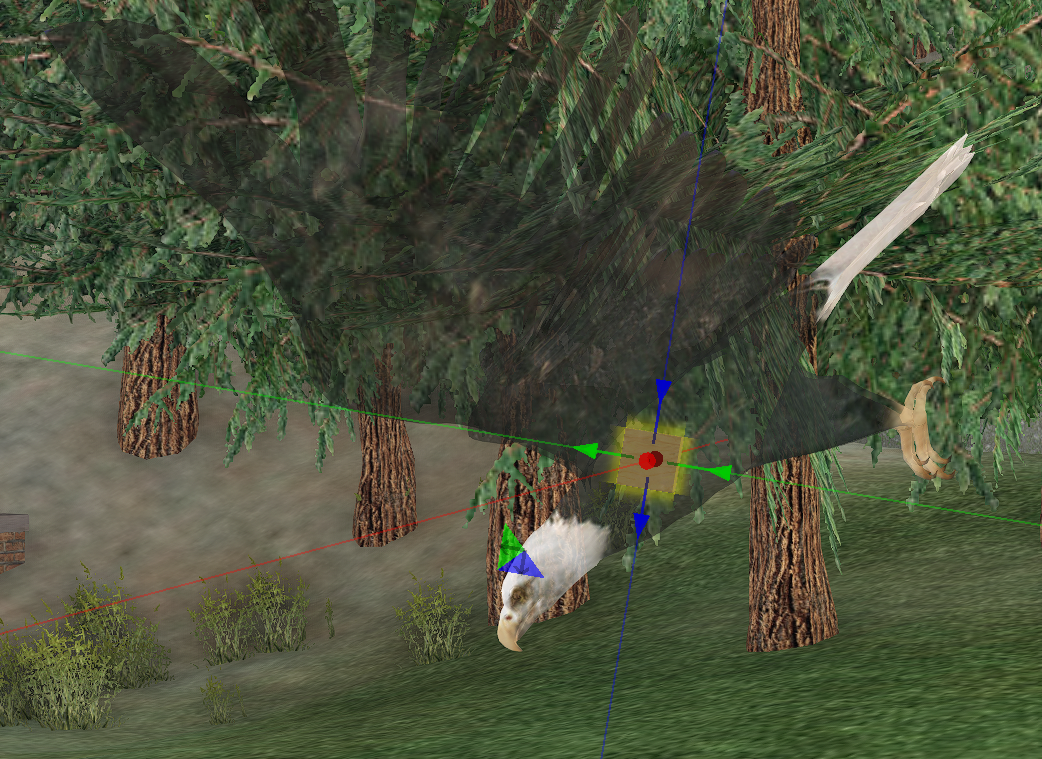
Mesh objects usually will not usually meet the requirement that the Z axis points toward the post location on the ground.
If this is the case, you can't just add the kite script to it, you will need to create a small cube that you can use as the root prim of the kite and link to mesh object to it. Add the kite script and notecard to the cube and then shrink the cube so that you can hide it inside the mesh object.
Here is an example of mesh eagle (that I've made partially transparent), where I've hidden the root kite object inside with the Z axis pointed down.